How To Prep Leather In 2 Simple Steps

April 11, 2023
Jane Smith, Managing Director
Step1/ Identification and cleaning
Using a sponge or Tampico Brush and the LRC1 Premium Leather Cleaner give the area you are repairing a thorough clean (if the seat is have a full re colour then you don’t need to clean the seat before you prep as it’s a waste of money and products). Don’t just clean the area to repair, clean the full panel. If it’s the base of a car seat or a chair clean all the facing leather to the sides and the upper sections of the seat or chair. If you are going to restore a complete car interior and or full suite use the Premium Leather Cleaner to clean all areas of leather. Make sure you get deep down in to the grain to remove all dirt. By doing this it will help to blend in your repair much better. If you are only doing a small SMART repair in the middle of s seat, then cleaning the full area fist is a good idea as you can then take a colour match from this area of the leather before you remove the leather paint and fully prep it.
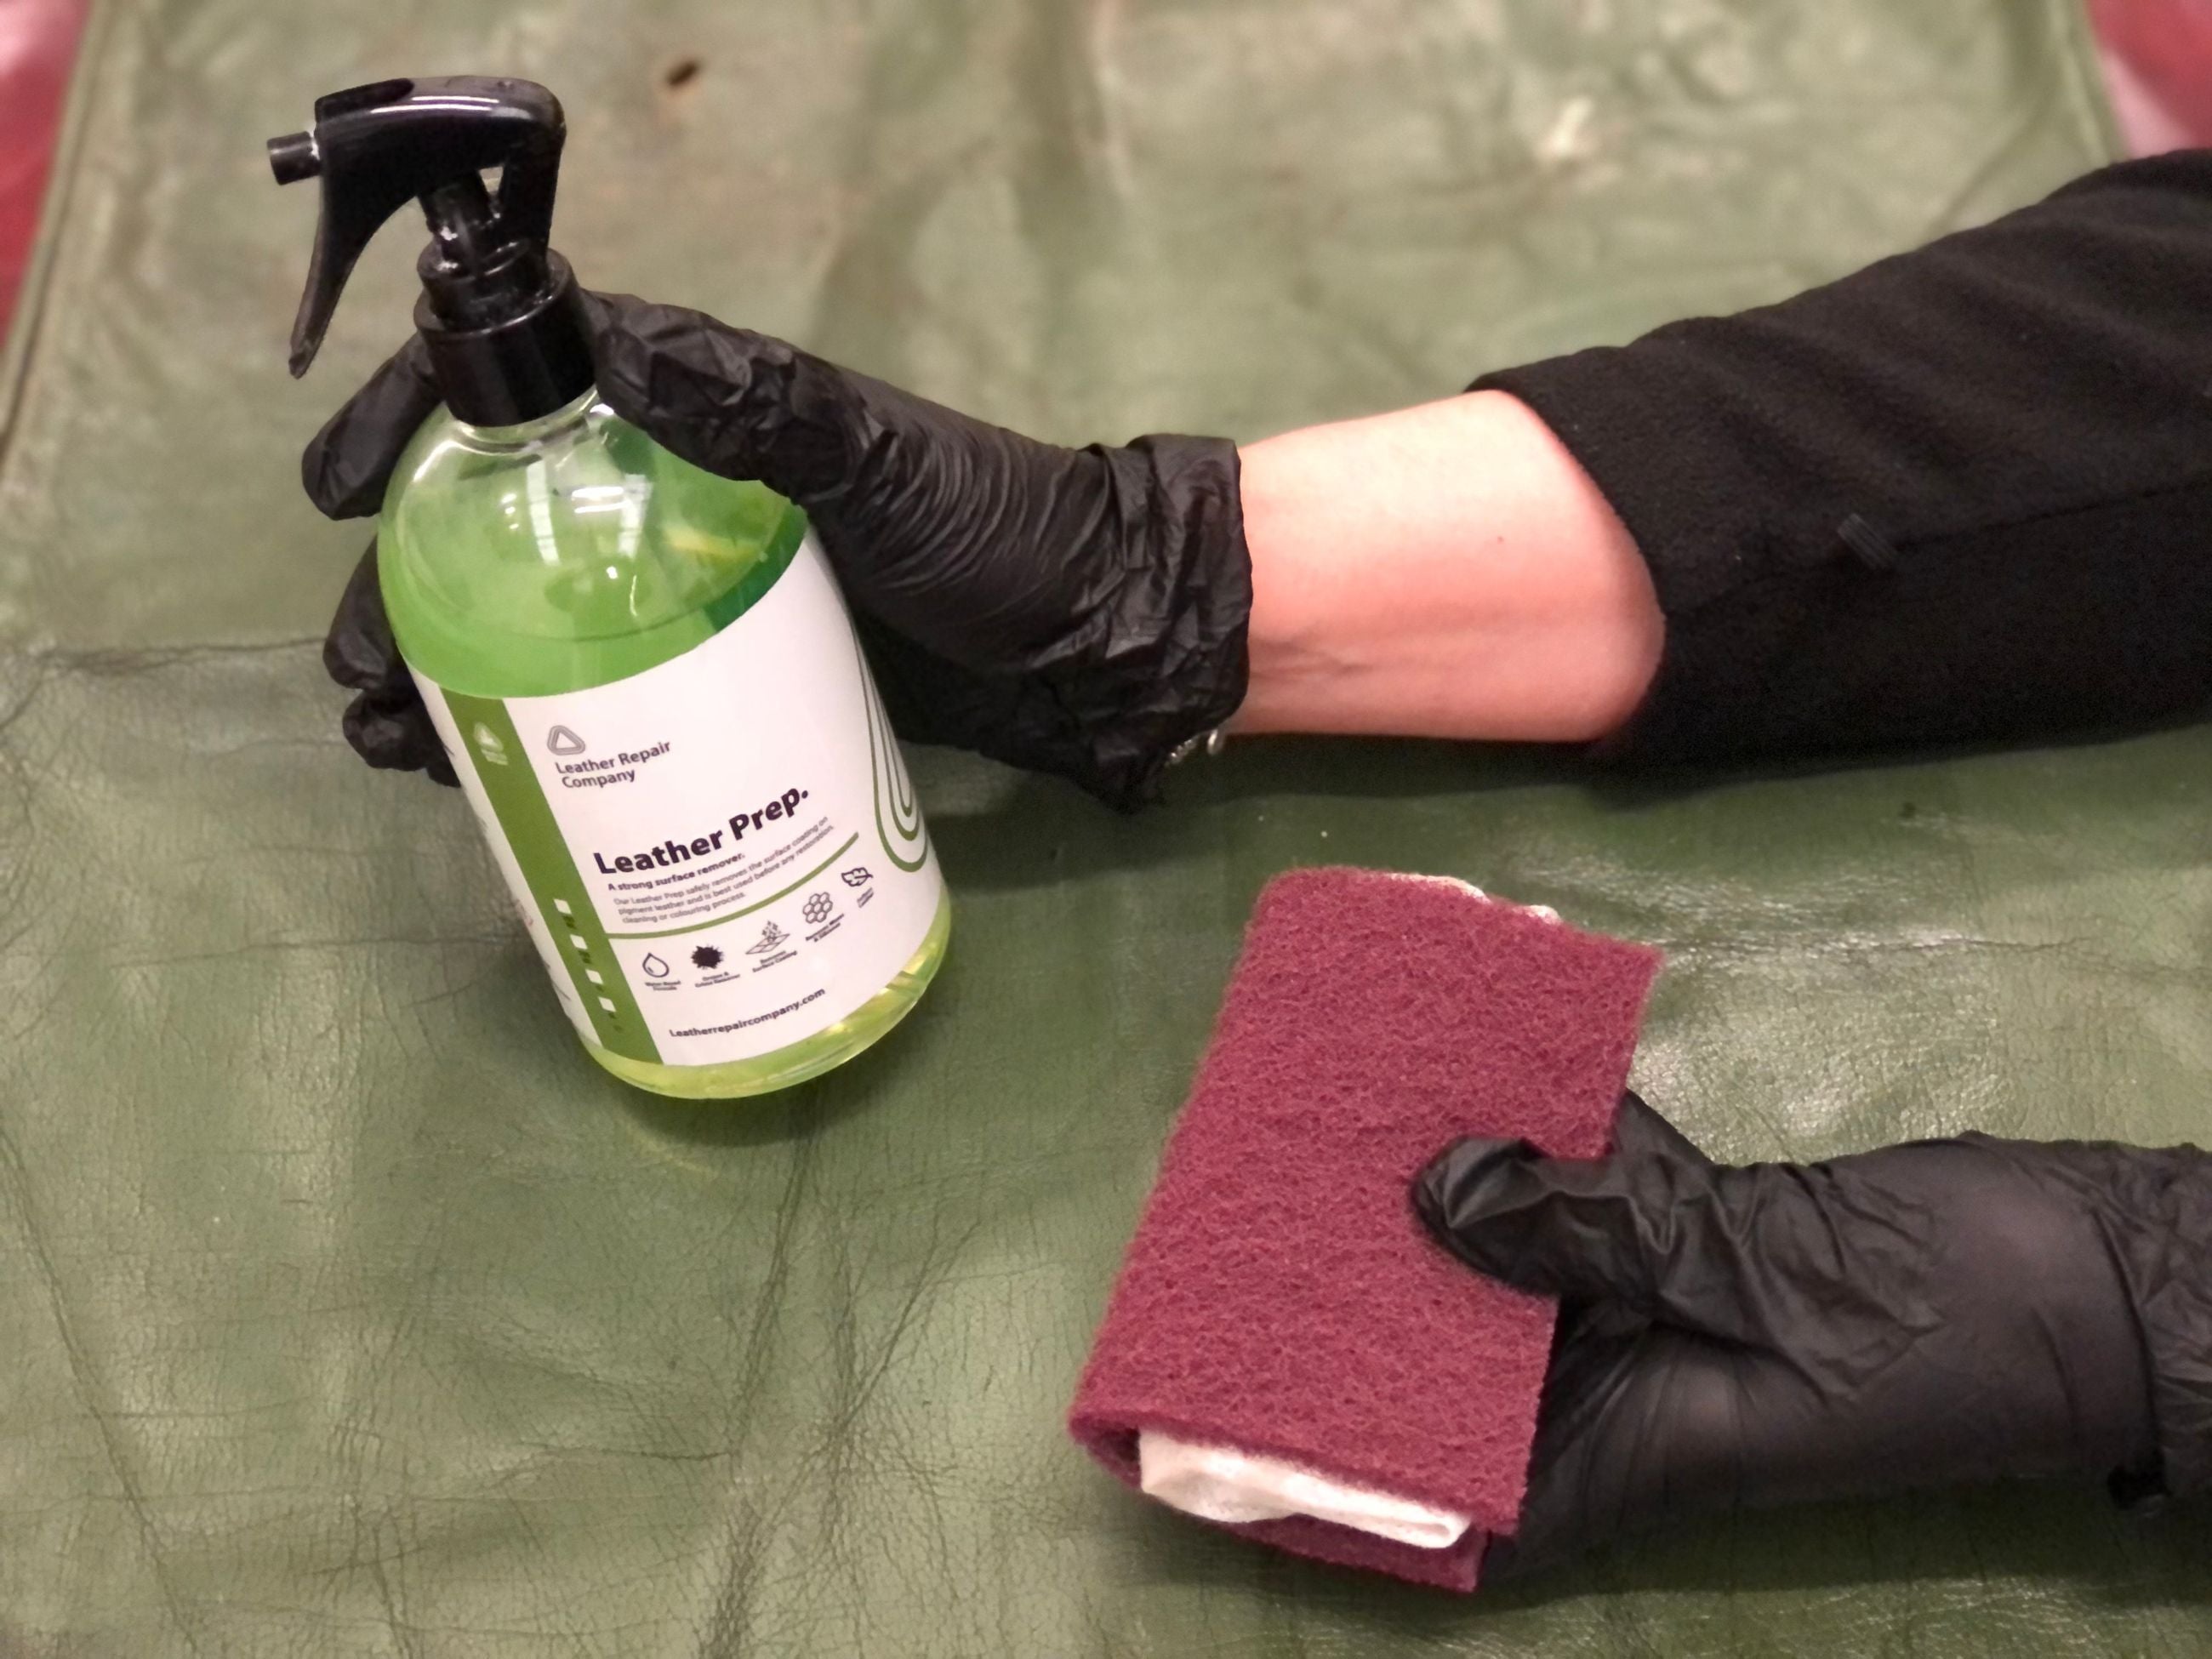
Step2/ Prep the leather – correctly
Using or terry towel cloth or an abrasive pad, red fine scotch pad, fold in half and place within the pad a section of towelling then soak the towelling in leather prep just so it starts to run out on its own.
Preparation of the leathers surface is the key point in leather colour repairs / leather restorations do not skip these steps it will not work and rectifying it will take time!
The purpose of using the leather prep is to prepare the surface ready to take the new colour, using the terry towel rub this over the surface to remove as much of the old colour as possible or the pad as above, this will remove most of the cracks in the leather as they are predominantly not in the leather itself but in the surface coating, the paint layer, that’s applied to the leather.
The Leather Prep thins down the surface coating, thus making the leather softer and feel much better. Dry cracked leather will be made soft and feel luxurious again after using the prep when carrying out a colour restoration process, as the prep removes the cracks and stiffness that’s in the leather and softens it to feel beautiful once again. This gives it a much better end result once colour has been applied to the new fresh surface.
If the leather after its had the surface paint removed still feels dry and stiff, then you can apply some LRC20 softening crème to soften up the leathers skin, this will put the softness back into the leather hide once again making the leather soft and supple again, this is done prior to any repairs being carried out or leather repair paint being applied.
NOTE DO NOT PREP ANILINE OR PULL UP LEATHERS WITH A SCOTCH PAD
Additional information about carrying prep work to leather.
With classic car seats (painted Connolly leather) they can look very badly cracked, this cracking is in fact in the top surface coating and rarely in the leather itself. Using the Leather Prep on this will remove it. This same process also applies to modern car interiors and furniture. Use the prep to thin the coat rather than fill the cracks.
If you are going to recolour a pigmented leather that has got grease marks, make sure you prep the leather first with the abrasive pad. The prep will break down the surface coating making the removal of any grease patch areas much better and more affective.
The prep will break down the surface coating making the removal of any grease patch areas much better and more affective. It is not always necessary to prep anilines or pull up leathers. But if you plan to change the colour ofpull up leathers then its best to prep it to remove the waxy oily finish coating. If you just need to cover a stain, then simply clean the areas down with the LRC1 Premium Leather Cleaner and wipe with alcohol cleaner and then spray the offending areas. If you are just wanting to fix small scuffs and scratches in painted leather you don’t always need to use the prep and an abrasive pad, but it’s always best to just wipe the area down with some prep on a cloth for good measures to remove waxes and oils.
With aniline leathers, you can prep these. But we would not use a red emery pad as they are too abrasive for these fine leather surfaces. Use the leather prep with a bamboo fibre applicator pad to help remove stains and grime and some surface aniline leather dye.
Even if you have not prepped the leather its very important to always lightly sand the area first with a 1200 grit paper, then wipe the area down with alcohol cleaner before putting on any colour, always use the alcohol cleaner after using the premium leather cleaner. Its best to apply the alcohol cleaner to cloth rather than directly on to the leather, then wipe the cloth over the leather with the alcohol cleaner as this takes off any final grease, grime or dirt from the leathers surface. Once this is all done you can carry out the repairs and re colour your leather item.
Leather that has grease stains in it, its best to use the gel grease remover to remove all traces of grease before applying any colour, if this is not done the colour will not adhere to the leathers surface and will come off again.
If you are de greasing an area its always best to go over this with the premium leather cleaner after de greasing and then wipe down with alcohol cleaner.
You are now ready to continue to any type of restoration, repair or colour change job.


Why Not Contact Us?
Call on: 01482 606864
Email us at: help@leatherrepaircompany.com